A. Stomping in. Obviously.
B. Stomping in hard enough to splash your brother, sister, mom, or dad.
C. Heroically saving a drowning worms life. You'll feel good about yourself all day if you fish those guys out and drop them safely in the grass- I guarantee it.
D. Floating handmade boats.
This summer I somewhat mastered the art of paper boat making during Cantigny's Wild Wednesday program. And when I say mastered, I mean I can make three basic kinds of boats, I am not an origami guru by any means. Please don't ask to see an intricate flower, or crane, or gorilla.
But these three boats, look out- I've got them down!
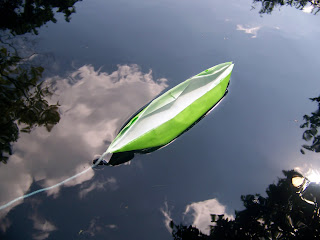
My favorite- the canoe- is illustrated step by step below. By the time you scroll to the last picture you too will be a nautically themed origami wizard....at least when it comes to little paper canoes. And with a little patience (on your part) and a little practice (on their part) your children will be folding and sailing boats by bath time!
So, grab a square of colored paper- the bigger the better for your first try ( I recommend using actual origami paper that is colored on one side) and start to scroll...
Start with your paper colored side up.

Fold it in half.

Fold it in half again, to create a square.

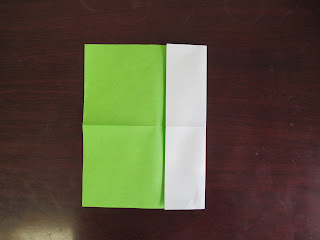
Unfold the entire paper so that you have a windowpane of creases.

Fold in one side to meet the center line. Repeat on the other side.


Fold up each corner to meet the middle line.


Fold each edge up to the middle line to form shallow a triangle. It is okay if they overlap in the middle.


Fold the top and bottom points in to the middle line.


Pinch the boat in half so that you see the colored paper through the center line.

Carefully turn the boat inside out so that the color is on the outside. Slowly shape the folds into the general boat shape.


To make the folds crisper and to help your boat stand up, refold the colored edges back down and press the boat flat. At this point, your children can also add some details- crayons work best as they will not run when wet.

Pop your boat back up, shape it and take it sailing! (I advise adding a tow line in case your little boat sails out of arms reach.) Don't leave your canoe in the water too long or the water will soak through the paper and capsize your vessel.

It's also fun to craft little boats out of natural materials. Collect nutshells, pinecones, sticks, leaves and flowers with your children then piece together a fleet of rafts, sailboats and cruisers. Half the fun is the sink or float test when you first set them in the water!
As Mark Twain put it, “Twenty years from now you will be more disappointed by the things that you didn't do than by the ones you did do. So throw off the bowlines. Sail away from the safe harbor. Catch the trade winds in your sails. Explore. Dream. Discover.”
So go, grab your kids and set sail.


Cute! Just ran across your blog.. I like it!
ReplyDeleteI also love the font you use on your heading (playdate with nature). Can you/will you tell me what it is please?
Hi Kara- so sorry so delayed in replying! I had some professional help with the title design, but I will find out the font and let you know. Thanks for reading!
ReplyDeleteThat's okay, I just came back now to check. :)
ReplyDeleteAHHH! So sorry Kara, the font is American Typewriter Regular. Thanks you for being SUPER patient!
ReplyDeletehaha you're too nice, thanks so much!
ReplyDelete